Heavy poster board (any color, but
the inside surface should be dark)
Holographic diffraction grating (See
the Projecting Spectra activity
for the source.)
Aluminum foil
Patterns (See pages 38 and 39.)
Pencil
Black tape
Scissors
Razor blade knife
Straight edge
Cutting surface
Spectrum tubes and power supply
(See the discussion section for
source.)
Procedure:
1. Cut out the patterns for the spectroscope housing. Trace them on to the heavy poster board. The patterns should be arranged like the sample shown on page 39.
2. Cut out the housing from the poster board. Lightly score the fold lines with the razor blade knife. (If you should cut all the way through, just tape the pieces together.)
3. Fold the housing to look like a pie shaped-box and tape the corresponding edges together.
4. Using the razor blade knife, straight edge, and cutting
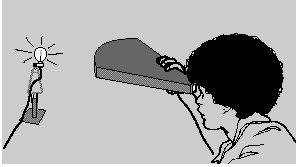
5. Cut a piece of diffraction grating large enough to cover the hole in the eyepiece rectangle. Handle the grating by the edges if possible; skin oils will damage it. Look at a fluorescent light through the grating. Turn the grating so that the rainbow colors you see appear in fat vertical bars to the right and left of the light. Tape the grating to the back side of the eyepiece rectangle in this same orientation. Refer to the pattern page for more information on the alignment of the grating.
6. Tape the eyepiece rectangle to the narrow end of the spectroscope housing.
7. Cut out the black measurement grid from
the paper. Tape this grid to the inside of
the narrow rectangle cut out in step 4.
Carefully align the grid with the hole so
that when you hold the front end piece to
the light, the grid will be illuminated by the